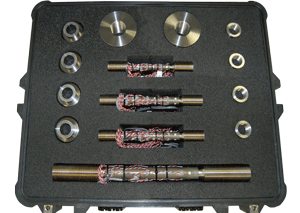
Alignment and Dynamic Verification Transducer(s)
Tovey Engineering makes alignment and dynamic verification transducers to support the materials testing industry.
- Alignment transducers are made to use in machine alignment to minimize the imposition of bending strains and stresses on specimens under test. These transducers are made to closely simulate specimens used for materials testing. TEI can manufacture the specimens or instrument specimens furnished by the customer. Alignment transducers typically have eight to twelve strain gages placed on the test section to allow the bending induced in the specimen by the machine and grip fixtures to be measured. Machine components are then adjusted to bring the alignment into appropriate bounds. Our alignment transducers meet the requirements of ASTM E1012, Verification of Test Frame and Specimen Alignment Under Tensile and Compressive Axial Force Application.
- Dynamic verification specimens are used to determine the range of frequencies the testing machine can be operated over while maintaining accurate force measurement with a given specimen geometry and fixtures. These parts are instrumented as full bridge transducers. The correlation between the machine load cell and dynamic verification transducer is determined quasi-statically. The machine is then operated at increasing frequencies of load application until the machine load cell and the verification transducer differ in output by the allowable error (typically 1%). This frequency sets the upper bound of the frequency spectrum over which the machine can be operated in that configuration.
- We offer custom transport cases and can supply fixtures for the transducers. We work closely with the customer to design custom made transducers to satisfy each application.


